A website for the serious amateur violin maker, restorer and tinkerer.    A violin front and back (the plates) can be tuned using tap-tones.    Use tap tones to adjust the 2 plates of a violin to get the best sound, the kind of sound you want, or make an instrument that is easy to bow.

This site has something for you if you are either making a violin or you want to improve  a low cost violin or viola.

By tuning the top & back plates you can get a good instrument that responds well to the bow and that can sound like a £1500 instrument.

tapping belly 2 sml Opus 1 smll 2
12 violins V1.2

Mail the webmaster

 Last updated             23rd Dec.  2014               Copyright    (C)     platetuning.org

Where to hold a plate to hear the tap-tones

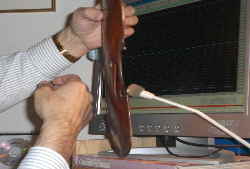
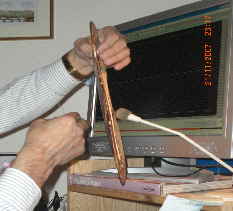
   Measuring the tap tone frequencies of interest (Modes 2 and 5, and possibly also Mode 1) takes only a couple of minutes, and involves no tuning forks or loudspeakers. The pictures below will show where to hold the plate: the belly or the back. .tapping belly 3 small
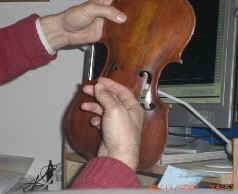
A plate needs to be held at any point on a nodal line, where the vibration amplitude at that selected resonant frequency is zero. This picture shows where to hold a plate (belly) to get Modes 2 and 5. Click on it or the one below for a better view.

Have a look on this page for the nodal lines. The ‘black lines' seen there are these nodal lines on the back & front plates, for Modes 2 and 5.

Mode 2 is called the ‘X' mode as the nodal lines are shaped surprisingly like an ‘X' - useful to help remember, but the ‘X' is two back-to-back C's on a belly!

Mode 5 is called the ring tone, as the black nodal lines (or the lines where tea leaves/sawdust migrates to when the plate are resonating above a ‘speaker) are ring or ‘O' shaped, particularly on the back plate. The front's or belly's (black) nodal lines are more like a pair of wavy brackets, one above the other, that extend right to the edges.

 The point to hold a plate is in the middle of the upper bout, as if the plate had an ‘eye' there as is the picture above. Importantly, holding here allows both Modes 2 and 5 to resonate when the plate is tapped, and suppress all the other Modes (and there are lot!). Their nodal lines do not pass through that point.  I also use other points right on the plate edge that allow only one tap tone to resonate like the upper corner for Mode 5, and choosing that holding point damps all other modes.   Experiment, play around!   You will soon find where the best holding point is if you hold the plate up to your ear, and listen where the mic should be. I warn you: you will look ridiculous.

Flatter plates (with lower arching), and bellies without bassbars need to be held lower down the plate.

Where to tap a plate, and what withtapping belly 1 sml
 I usually tap the plate right in the middle (the bridge position) for Mode 5, and at an edge (C - bout) for Mode 2.

The tip or pad of the first or second finger works well for Mode 2, and the knuckle for Mode 5. I'm using the knuckle here. You can use the eraser on the end of a pencil: it gives a higher Mode 5 and also many higher Modes too.

Where to locate the microphone.

 The mic, preferably one on a ‘stick', must be placed close to 1 - 2 inches away from an anti-node. The anti-node is in the middle of the plate for Mode 5, and at one edge (C-bout) and at the bottom block position for Mode 2: have a look at the pictures. With the mic at the centre of the plate, Mode 5 will be strong (as there's an anti-node there), and Mode 2 weaker. Actually a Mode 2 broad nodal line is there, but it is still picked up a bit. You can see this from the FFT pictures below. In one case I measured, there was no Mode 2 picked up by the mic at all - because of this nodal line (no vibration) down the centre line of the plate. I usually move the plate up during the tapping so the mic's opposite the bottom block position to make sure Mode 2 is picked up.

Screen capture and dB's

 In the screen dump of the FFT (see later), Mode 5 is 15 dB above that of Mode 2 when the mic stays at the centre of the plate and it it tapped with a ‘harder' object: a pencil eraser (on the pencil!) or the knuckle. I use the free  Ashampoo ‘Magical Snap' for screen capture, turning what's on screen to a .jpeg picture file. Or use Photoscape (also free).  I then paste the picture directly into Serif PhotoPlus (the ‘SE' version is free) or into Photoscape!

 “15 dB” here means about 8 times bigger in amplitude as dB's are a logarithmic scale. Usually the Modes 2 and 5 are about the same strength on the FFT screen when you move the plate during tapping so the mic picks up Mode 5 at the centre, and Mode 2 around the bottom block position.

How to get and interpret the results: the tap tones of Modes 2 & 5

   First you will need to download and install the Audacity software from the ‘Sourceforge' download page. This is a superb, free PC program to record and analyze sound picked up by your PC microphone. I always use mono recording as there's only one mic!  There's also a version for the Apple Mac.

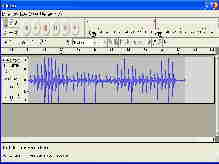
  Now record the plate tap tones using this Audacity software by pressing the red button with the mouse pointer. This button is top left in the picture on the right - click on the picture to see it. I usually tap the plate in the right place about 10 times in 5 seconds.

 Select the 2 silences at the eitherAudacity 1 end of the waveform with the mouse left hand button pressed and delete them using the delete key. This leaves a good waveform to work with: you may need to adjust the mic sensitivity down so the mic is not overloaded

 Select all the recorded waveform left in the window using “Control + A” keys pressed simultaneously and go to the ‘Analyze' option on the top line of the window and select the ‘Plot Spectrum' menu item that drops down. This calculates the Fast Fourier Transform (the FFT) of the selected waveform: that is it shows all of the resonant frequencies or tap tones present in the sounds picked up my the microphone.

You will need to enlarge the ‘Frequency Analysis' window,  and at the bottom left of the screen select ‘Spectrum'16,384 (the sample window size), Hanning window, and finally ‘log' (or logarithmic) display.Audacity 2 Spectrum

  I've included 2 pictures (screen dumps) of typical Audacity windows, one above showing the waveform, and one right showing the FFT screen. Click on them for the full size pictures.

      In this example of a front (belly) with a good bassbar fitted, Mode 2 peak is at 167 Hz, and, also shown selected with the cursor is the  333 Hz of Mode 5*.  What's so good about Audacity here is that the cursor pops automatically to the nearest peak and shows its frequency under the display, under the purple area bottom left. Be careful to read the ‘peak' frequency on the right and not the ‘cursor' frequency on the left ! Now  write it down - I keep a small transparent folder for each violin to record all progress, results and calculations.

 You can find instructions for using Audacity software here, or use a 10-part tutorial on YouTube here.

    Audacity also allows the export of data to MS Excel (or an OpenOffice spreadsheet) to calculate the energy at various frequencies.. It's shown as an ‘Export' button, bottom right of the Freq. Analysis window, and allows a graph of amplitude v. frequency to be drawn in the spreadsheet using the ‘X-Y plot' option.

Other Software options

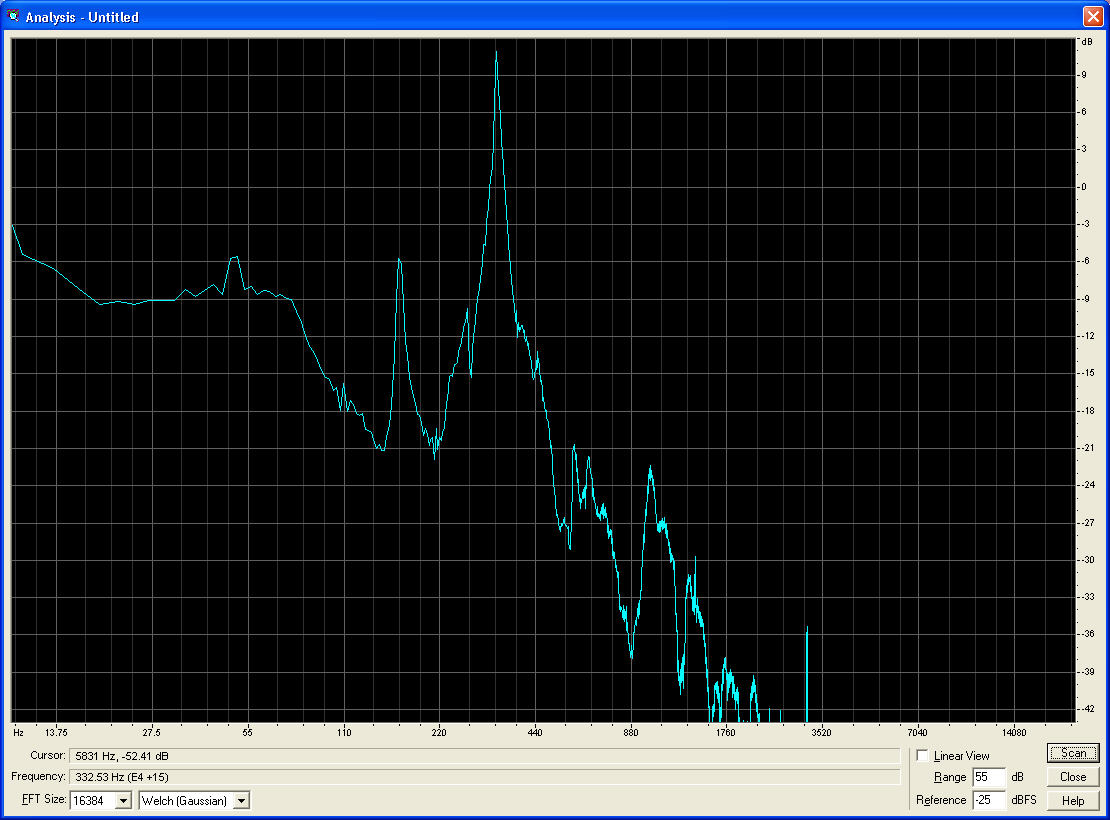
    There is some very old software front final 21.Nov.07called ‘CoolEdit 2000' (windows XP only), and  I've included here a screen-dump showing the tap tones for a belly. It can be found on the web as a trial but I've used it for years, as the FFT still works long after the 30 days! It is my favourite waveform capture, with a very good FFT function. You can see here mains hum at 50 Hz (!), and then  the Mode 2 peak, and the Mode 5 peak clearly. There are other small peaks too, and these are the other Mode resonance's of the plate, which apart perhaps from Mode 1, are of little interest. Note how broad each peak is: a good plate will have a very high, sharp i.e. narrow Mode 5 peak. The higher and stronger the better.

Another possible waveform/FFT software program VisAnalysis iconis Visual Analyser 2011 by Alfredo Accattatis. It is free to use, and has a pretty good real-time spectrum analyser as well as a standard FFT function you apply to a captured waveform. Note that the X-axis for the FFT does not plot to a log scale. The controls are a little quirky. You will need to use the ‘hold' function to record a spectrum in real time - it works quite well, and is quick. Erase the spectrum by deselecting (un-ticking) ‘hold!'

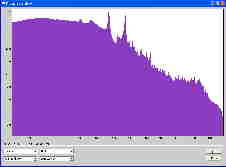
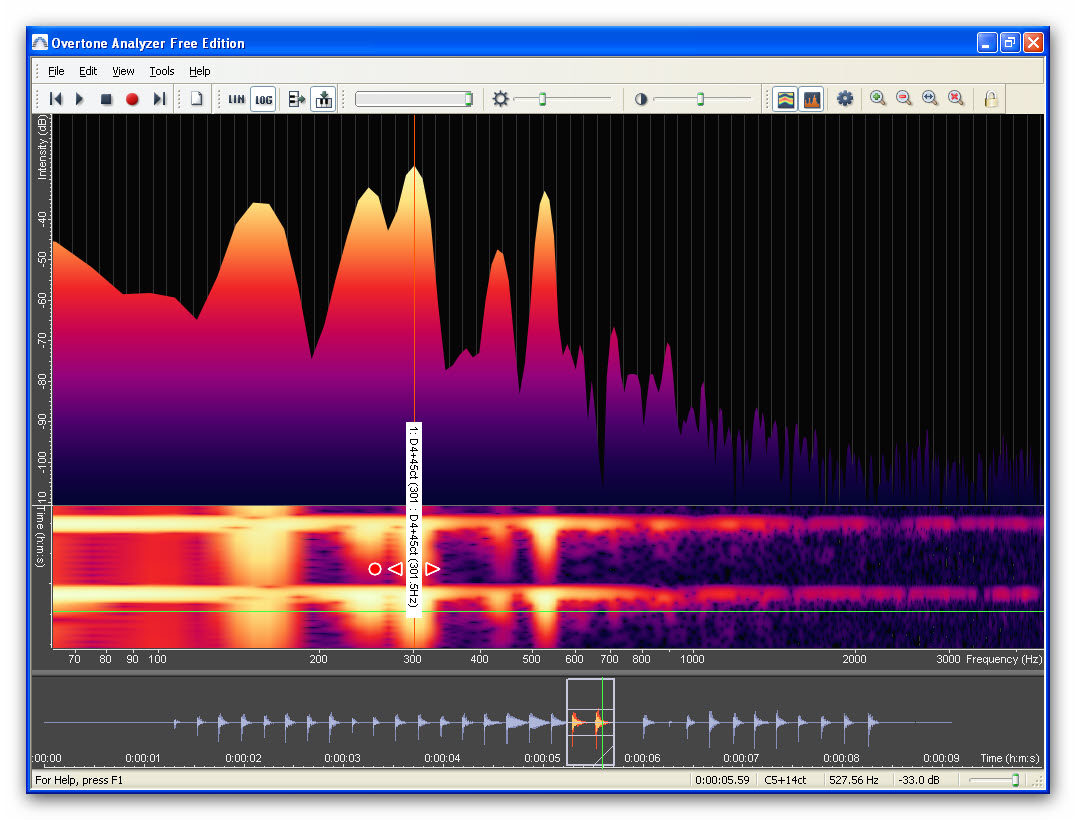
Therebelly no bassbar - Sygyt is also a free version of Overtone Analyser from Sygyt software which can be downloaded from here.  An example of a screen dump from Overtone Analyser (Free Edition) is here leftt: click on it. This is the spectrum for a belly with no bassbar where Mode 5 is at 301.5 Hz  Pieter Swanepoel wrote in to say he uses it, but I find it a little confusing as the plate is tapped and the tones are not continuous: but each to his own. The paid-for versions are much more versatile. The ‘Live' version is 99 Euros.

Strobe Tuners

A company called Peterson make a range of strobe tuners, best described on this YouTube video. The latest is the ‘StroboSoft' PC software for about $50. Strobe tuning techniques have been in use since Lloyd A. Loar's outstanding work in the 1920's on the Gibson F4 (and F5) mandolin plate tuning. They have a flat or rather carved front and back plate. His work has encouraged plate tuning on all kinds of instruments in the USA ever since, as the F4 and F5's from that era are truly the ‘strads' of mandolins!  Roger Siminoff is the current US guru on plate tuning, and has published several books.

The advantage of ‘strobe tuners' is they allow rapid visualisation of the tap tone's pitch, and also its harmonics: i.e. a frequency and all of its octaves. This may require a compressor (as used with guitars) to stretch the tap tone out.

* Yes!   An octave front plate, where Mode 5 is 2 x Mode 2's frequency!     Octave means twice the frequency, and it is what Carleen recommends.

BuiltWithNOF
[PlateTuning.org]