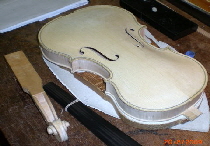
A website for the serious amateur violin maker, restorer and tinkerer.    A violin front and back (the plates) can be tuned using tap-tones.    Use tap tones to adjust the 2 plates of a violin to get the best sound, the kind of sound you want, or make an instrument that is easy to bow.

This site has something for you if you are either making a violin or you want to improve  a low cost violin or viola.

By tuning the top & back plates you can get a good instrument that responds well to the bow and that can sound like a £1500 instrument.

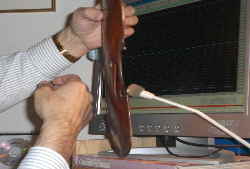
tapping belly 2 sml Opus 1 smll 2
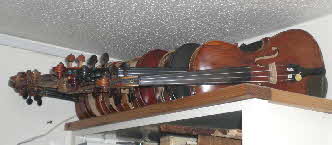
12 violins V1.2

Mail the webmaster

 Last updated             18th Dec.  2014               Copyright    (C)     platetuning.org

You will need :-

Courage,

The right tools, and plenty of time.

Be prepared to make a lot of mistakes, so start on a cheap violin. A faint heart ne'er won the maiden. Have a mistake on me.

If your working on the plates of a new  fiddle your making, or you have one completely in pieces you're lucky! The weights and tap tones will be there ready for the asking or the measuring.

  It takes me about 10 hrs. per violin to take off the front and fingerboard off a ‘factory fiddle', modify **  the front and back to appropriate tap-tones and put the fiddle back together. On top of this is any time for any repairs, like a sound-post patch and varnish touch-up:  but be warned. This is without having to take the back off the bouts (sides) and glue them back on.

Removing the front - the belly plate

      Removing the back can cause a great deal of damage ........., but I have found ways of measuring (deriving) the weight of the back, and also the Modes 2 and 5 frequencies of the free plate while it is still in the bouts with the neck in place.  

    The Mode 5 of a back plate is reduced by about 15%*, but sometimes splits into 2 frequencies up to 40 Hz apart, usually either side of 300 Hz.

    Mode 2 of a back in the bouts  is only slightly increased, but the neck (with no fingerboard) has a resonant frequency at almost exactly the same frequency, so we have to move the neck's resonance out of the way!

    Get in touch with me if you want to know more.


Use a shortened table knife to remove the front plate (the belly) and the fingerboard, but do be careful. You are trying to ease the knife into the joint and ‘lever' the plate off, not to cut into the joint.

    Removing the front (belly) is made much easier if you carefully feed into the joint a little warm Isopropyl alcohol mixed with water (50/50). I have used it heated in a baby bottle warmer to 50 degC, and the belly came off in about 10 minutes with very little damage, but it can take a day. Note that the alcohol may well damage or soften some varnishes, so experiment first, and be prepared to touch up the varnish carefully later.

When all the belly is nearly off, feed a small amount of the warm alcohol/water fluid down or via a long bladed knife to get it into the top block joint with the belly held slightly open. And with that the belly should come off relatively undamaged.

    Dangers

    I've managed to cut myself  quite badly doing this on my left hand, as I'm right handed. Always cut away from your left hand, as the knife can suddenly fly out of control as the joint gives way, so using a leather gardening glove on your left hand reduces the risk of a serious wound a lot!

*: Footnote on accuracy: As this method measures Mode 5 indirectly then there is a possible inaccuracy. I estimate that using this method there is a Standard Deviation of ~4.1%. That means that my estimates are 68% likely to be in error by not more than 4.1 %, and 95.5% likely to be out by no more than 8.2%. There's more detail on this here on the Wikip'dia page.

  ** This is by using the thumb plane(s) on the inside of back and front plates, leaving the varnish intact. Obviously you cannot alter the arching at all with this method unless the back is over-thick and you are prepared to refinish the back.


BuiltWithNOF
[PlateTuning.org]